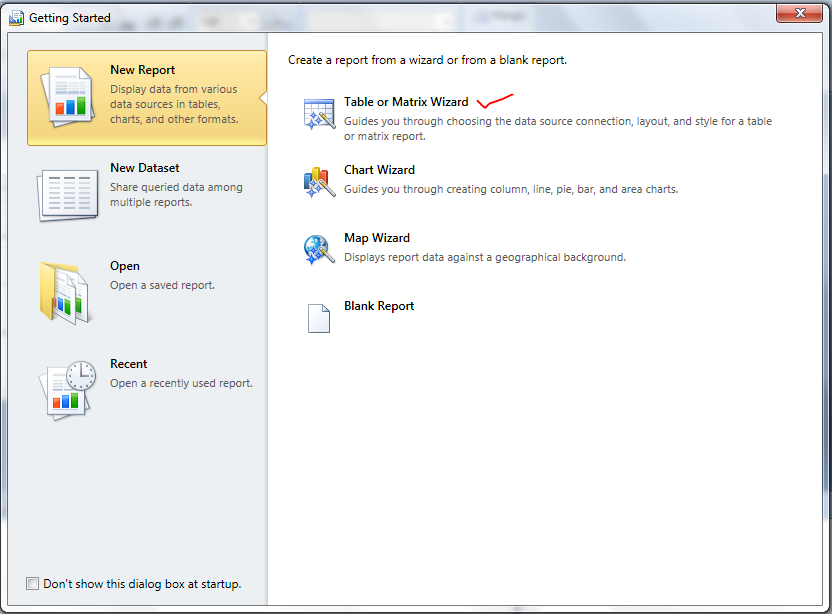
CASCADING PARAMETERS
Cascading parameter means that one parameter is depends on the other parameter.
Lest see how this in the following example
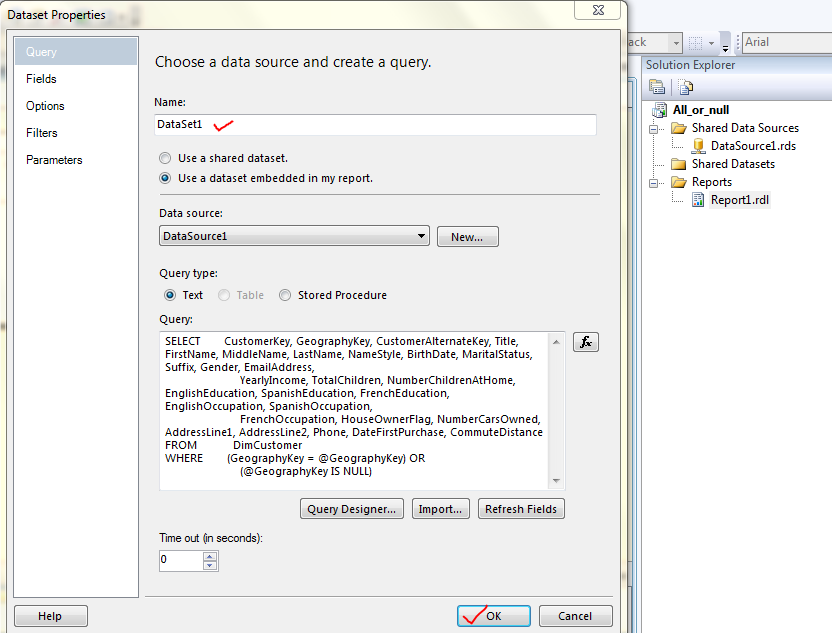
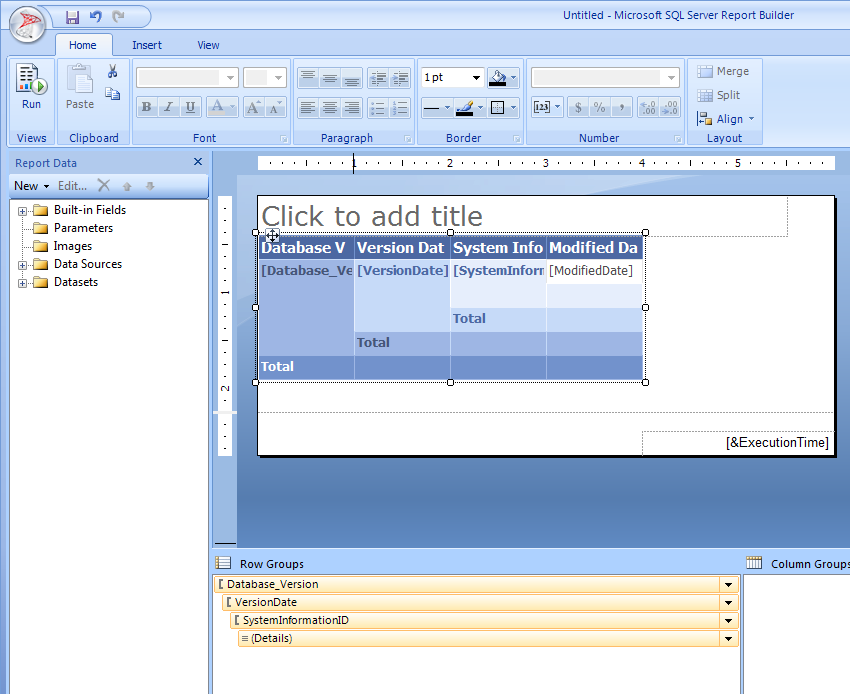
Step1: Create a data set along with where clause contains TWO parameters(See the following image)
Step 2:Create a dataset2 for getting deptno and dname from dept
Step3: Now you can select the empno from emp_tbl where clause DEPTNO
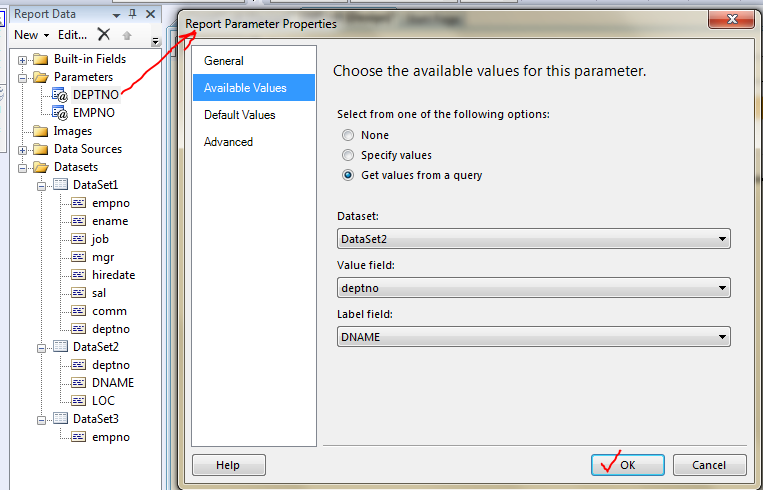
Step4: Go to parameters -->General--> keep check mark to MULTIPLE VALUES-->Available values-->Select the dataset,value field,lable field-->OK
Step5: Go to parameters -->General--> keep check mark to MULTIPLE VALUES-->Available values-->Select the dataset,value field,lable field-->OK
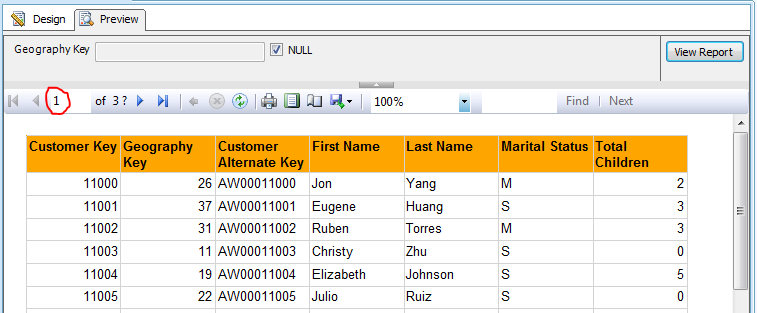
Step6: Now click on preview-->select deptno from drop down list
(Observe that EMPNO at hidden position until you select the department)
Step 7: From the second drop down select the emp numbers
Step 8: Now look at the preview