SSRS by VAGALLA SURESH REDDY
SOFTWARE ENGINEER, INDIA
Friday, 14 March 2014
Monday, 24 February 2014
Repeat Header for Table on Each Page and while scrolling
Repeat Header on Each Page
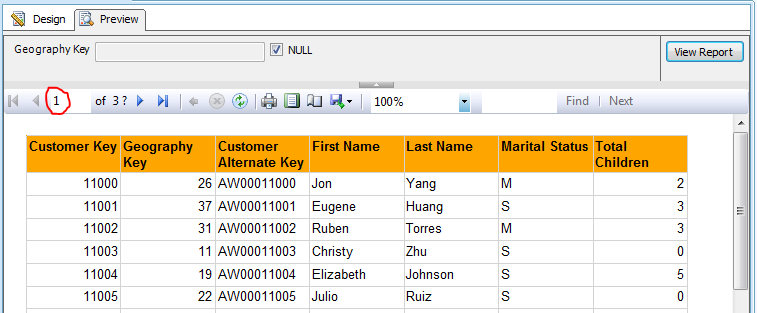
Step 1: Look the below image initially how it is! in the page 1 and page 2(second image)
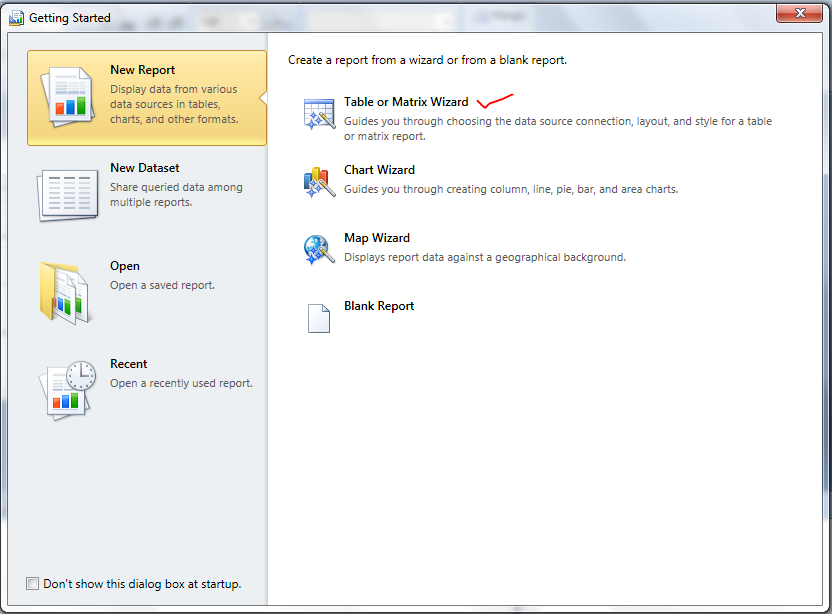
Step 2: Choose the advanced Mode option
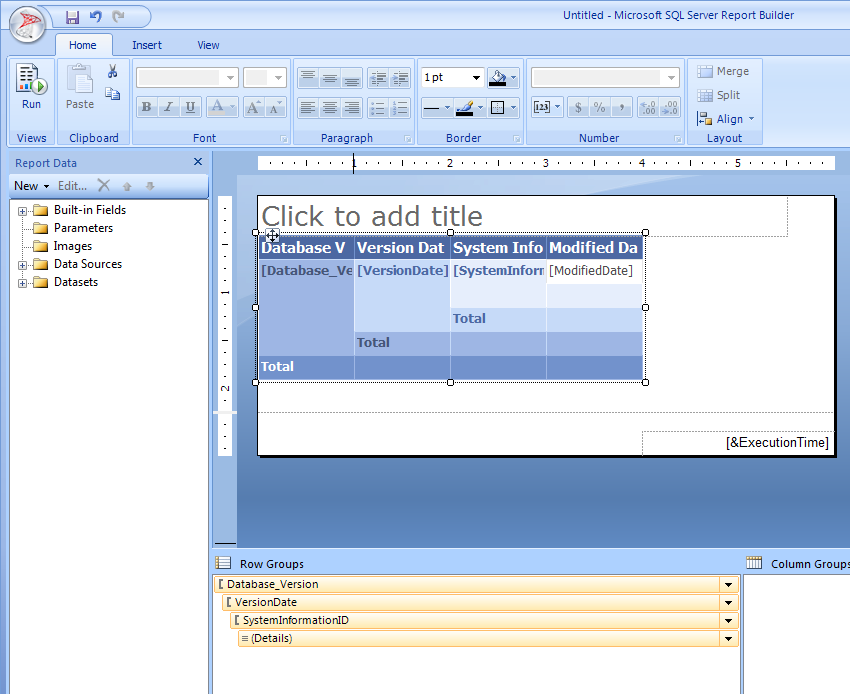
Step 3: Click on Static at the row level then hit F4 (properties ) --> at the tablix Member make Fixed data True, Keep with group after, repeat on new page true
Step 4: Now the page headers are appears on all pages and while scrolling also
ISNULL optional Parameter in SSRS
Display by Default all values with NULL Option in SSRS
Step 1:
Create a report with data source and parameter with Isnull parameter as shown below
Step 2: Preview the report. Here we are getting only given value's output
Step 3:Now go to parameter properties and mark the check box as shown below
Step 4: Go to default values and select Specify values--> add-->(Null)-->OK
Step 5: Click on preview. Now you can find all values by default. If you want individual data like ware condition, un check the box and enter the value
Step 6: Compare the Step 2 and Step 5 to find the variation
Monday, 17 February 2014
Wednesday, 12 February 2014
SSRS CONFIGURATION
SSRS configuration
Step 1: Open SSRS Configuration manager(Start-->Configuration Tools-->Reporting services Configuration Manager)
Step 2: Connect-->Give server name-->Connect
Step 3: Service Account-->choose BUILT IN Account-->for file location Browse and give any path-->Provide pass word-->OK-->Apply
Step 4: Web Service URL-->APPLY
Step 5:
Database-->Change Databse-->Choose Either radio button from two buttons-->click Next (Give servername if choosen the option Existing report server DATABASE)-->Next-->Next-->next-->Finish
Step 6:
Execution Account-->Click check box-->Alias name along with server name with "\" and password-->Apply
Step 7:Open Internet Explorer (Must be Default Browser Else Follow the steps to made default -->settings or tools on browser-->internet options-->Programs-->make default-->ok)-->Run as administrator by right clicking on browser image
Step 8: Close the browser
Step 9: Click on Report manager URL in reporting services configurations manager
(Opens the Reporting services WEB Page)
Step 8: Close the browser
Step 9: Click on Report manager URL in reporting services configurations manager
(Opens the Reporting services WEB Page)
HOW Deploy a REPORT
Deploying a REPORT
METHOD 1:
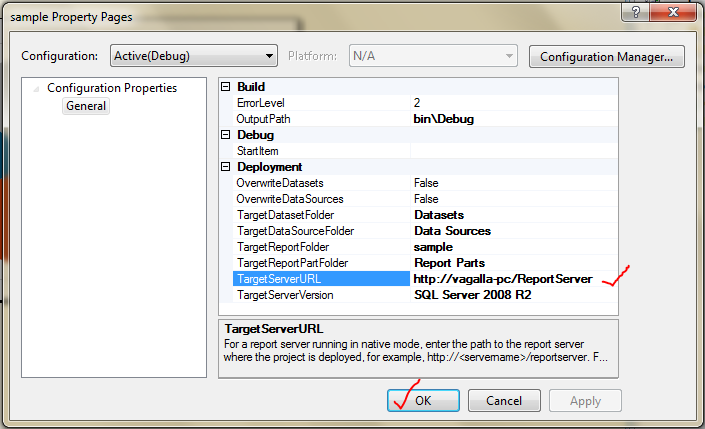
Step 1: Right Click on Report Name--> Go to properties--> Paste the URL (It could be like http://<server name>/reportServer)
Step 2: Right Click on Report Name--> Click on BUILD
Step 5: Now go to web Browser refresh it. You can find your reports here.
1.Initially browser
2.When refreshing
Step 6:
Click on report name(My self Sample)
1.Initially browser
2.When refreshing
Step 6:
Click on report name(My self Sample)
Step 7: Select the deptno from drop down list ,you will get the result like below
METHOD 2:
METHOD 3:
Using rs UTILITY
rs {-?}
{-i input_file=}
{-s serverURL}
{-u username}
{-p password}
{-e endpoint}
{-l time_out}
{-b batchmode}
{-v globalvars=}
{-t trace}
rs –i c:\scriptfiles\script_copycontent.rss -s http://localhost/reportserver
Saturday, 1 February 2014
CASCADING PARAMETERS IN SSRS
CASCADING PARAMETERS
Cascading parameter means that one parameter is depends on the other parameter.
Lest see how this in the following example
Step1: Create a data set along with where clause contains TWO parameters(See the following image)
Step 2:Create a dataset2 for getting deptno and dname from dept
Step3: Now you can select the empno from emp_tbl where clause DEPTNO
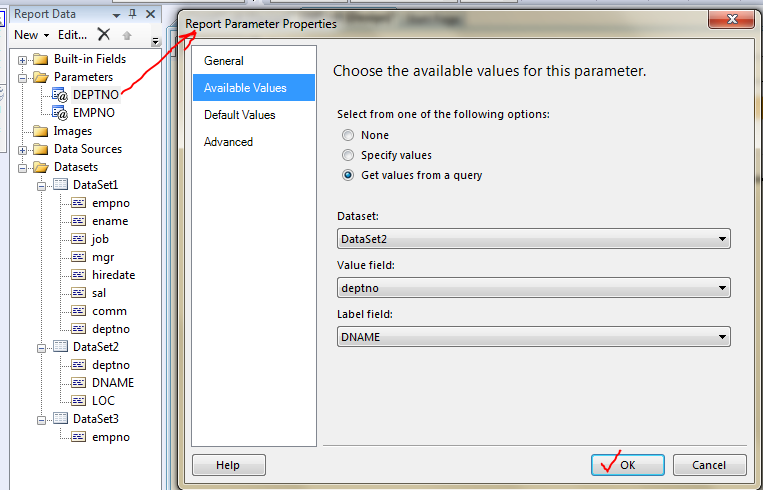
Step4: Go to parameters -->General--> keep check mark to MULTIPLE VALUES-->Available values-->Select the dataset,value field,lable field-->OK
Step5: Go to parameters -->General--> keep check mark to MULTIPLE VALUES-->Available values-->Select the dataset,value field,lable field-->OK
Step6: Now click on preview-->select deptno from drop down list
(Observe that EMPNO at hidden position until you select the department)
Step 7: From the second drop down select the emp numbers
Step 8: Now look at the preview
Subscribe to:
Comments (Atom)


